The Tutor Console
The Tutor Console is the primary interface for:
-
Configuring the Tutor (Control)
-
Connecting to Students
-
Maintaining Student information
-
Selecting which Students to work with
-
Selecting tasks to carry out.
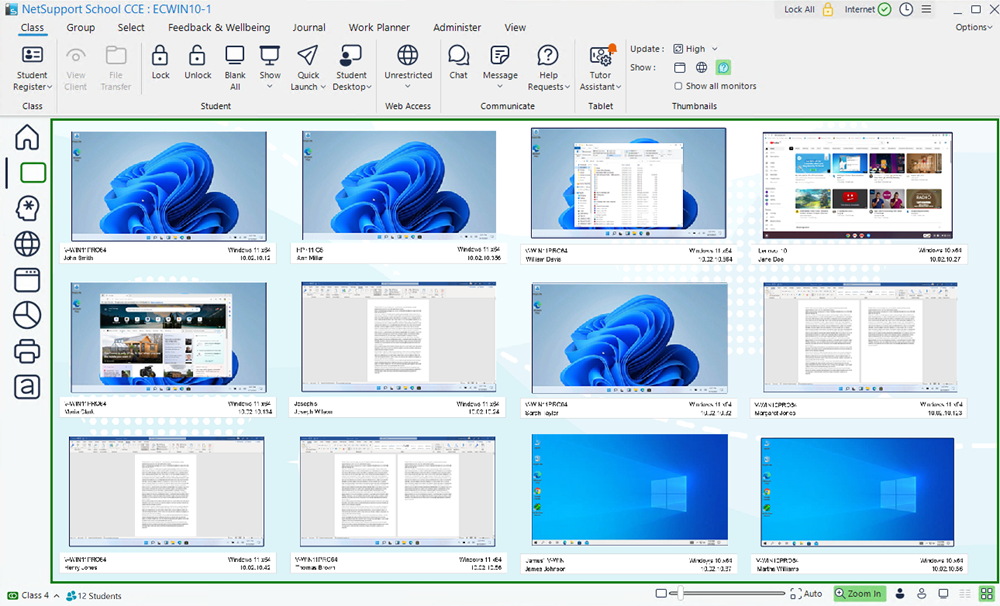
Tutor Console window
The caption bar
This indicates that you are in the Tutor Console and displays the name of the NetSupport School CCE Tutor machine.
The following options are available on the right-hand side:
|
[Hamburger menu icon] |
Opens the Quick Access list |
|
[Minimise window icon] |
Minimise the window. |
|
[Maximise window icon] |
Maximise the window. |
|
[Close window icon] |
Close the window. |
Options
From this drop-down menu, you can turn off the colour-coded user interface; access the settings, help file, version number, licence and Technical Support information; and access any Tutor Console updates (Options is highlighted if there is an update available).
The ribbon
The ribbon provides access to all the features and tools.Positioning the cursor over an icon will display a brief description of its function. The ribbon is organised into the following tabs:
Class: From here, you can ask Students to register their details at the start of a lesson, access individual Student features, set the level of web access and communicate with Students.
Group:
Select: From here, you can select which Students to work with and view in the List view![]() Displays the currently connected Students or groups. You can switch the display mode between large icons and details view from the View tab in the ribbon..
Displays the currently connected Students or groups. You can switch the display mode between large icons and details view from the View tab in the ribbon..
Feedback & Wellbeing: Allows you to give rewards and animated stickers to Students (these appear on the Student Toolbar), request feedback from Students to check their wellbeing, access the Test Designer and run tests at Students.
Journal: Allows you to start a Student Journal![]() The unique Student Journal ensures all relevant information from a lesson is recorded for future review. and decide what content is added for Students to review after the lesson.
The unique Student Journal ensures all relevant information from a lesson is recorded for future review. and decide what content is added for Students to review after the lesson.
Work Planner: Send files to or collect files from Students, manage the available Student resources, set a class timer and create and manage lesson plans.
Administer:
View: Allows you to select the view mode, how Students are displayed in the List view (large icons or details view) and whether to view the action bar and Student Toolbar.
The lesson plan bar
The lesson bar allows you to create a lesson, provides tools to manage the lesson once in progress and advises you on the current activity.
View modes
The left-hand side of the Tutor Console lists the available view modes. Clicking an icon here changes the display of the List view and the icons applicable to the mode are displayed in the Class tab.
The following view modes are available:
|
|
Home view |
|
|
Monitor view |
|
|
Q&A view |
|
|
Web view |
|
|
Application view |
|
|
Survey view |
|
|
Print view |
|
|
Typing view |
By default, the colour used in the Tutor user interface changes to match the current view mode. You can turn this off by clicking Options in the Tutor Console and selecting Colour Coded UI (this option is highlighted when turned on) from the drop-down menu. You can also enable/disable this in the Tutor User Interface settings.
The List view
The List view displays the currently connected Students. You can switch the display mode between large icons and details view from the View tab in the ribbon or the status bar.
The status bar
The status bar is displayed at the bottom of the Tutor Console. It shows the current class you are in (you can end and refresh the class from here) and the number of currently connected Students. You can select which Students to perform actions to from here and how Students are displayed in the List view.
