Installing the Student extension for Google Chrome on the Student Chromebook
The NetSupport School Student extension for Google Chrome must be installed on the students’ Chromebooks and configured to connect to the NetSupport Connectivity Server in order that they can be monitored, managed, and respond to surveys and the student register.
Installing and configuring the NetSupport School Student for Google Chrome extension
-
Download the NetSupport School Chrome extension from the Google Chrome store.
-
Enter the URL chrome://extensions/ to access the ‘Extensions’ configuration page.
-
Locate the NetSupport School Student for Google Chrome extension and click Options.
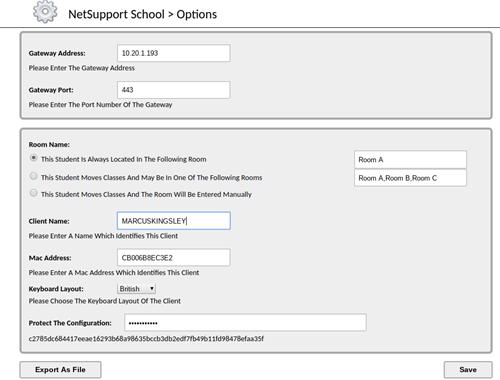
The NetSupport School Student extension for Google Chrome and NetSupport School Tutor application connect to each other via the NetSupport Connectivity Server.
Gateway Address
This is the IP address that your NetSupport Connectivity Server is listening for connections on.
Gateway Port
This is the IP port number that your NetSupport Connectivity Server is listening for connections on.
Room Name
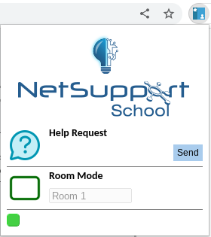
Room mode
 Allows you to connect to Students in a specified room. offers a quick and easy method for teacher and student devices to connect to each other at the start of a lesson. Room mode requires the Tutor and Student components to have the same room value configured. Once done, the teacher can simply click the Refresh icon on the Tutor Console toolbar to connect to available students in their room.
The student devices can be configured in one of three ways:
This student is always located in the following room: If the student is always assigned to the same classroom, select this option and enter the required room.
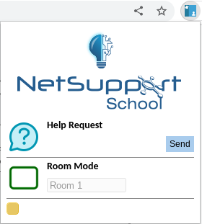
The student can see the room that has been assigned to them by clicking on the NetSupport School icon on the right of the browser address bar.
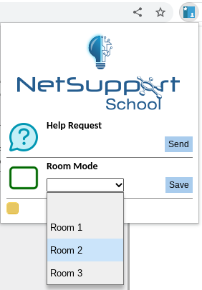
This student moves classes and may be in one of the following rooms: Select this option if the student moves between classrooms; enter the required rooms, separating each value with a comma.
In this mode, the student can select the correct room by clicking on the NetSupport School icon on the right of the browser address bar and choosing the appropriate room from the drop-down list.
This student moves classes and the room will be entered manually: Select this option if there are no set rooms and you want the student to enter the room name manually.
In this mode, the student can enter the room that the teacher has told them to go to by clicking on the NetSupport School icon on the right of the browser address bar and typing the room name.
Note: Although not case sensitive, this value must match that set at the Tutor.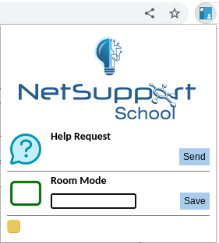
Client Name
This is a unique identifier for each Chromebook user and is the name that will also be displayed in the Tutor Console to enable the teacher to identify each Student device. By default, this will display the first part of the logged-in user’s email address (as associated with their Google account). Depending on your preferred mode of connection (User Mode, Name Mode, etc.), you can change the value but it must remain unique and up to a limit of 30 characters.
Note: At the start of a lesson, the teacher also has the option to create a Student Register that can be used to replace the generated Chromebook Client name with, for example, the actual student names.MAC Address
If your Chrome devices are centrally managed and enrolled within the Google Admin Console, NetSupport School will form the address based on the registered device ID up to a limit of 12 characters. Alternatively, the address will mirror the Client Name field, again up to a limit of 12 characters.
Keyboard Layout
Select the keyboard layout for the Student from the drop-down list.
Protect the Configuration
Once you have entered the required student configuration options, it is recommended that you protect the settings by entering a password.
-
Once you have set the required options, click Save.
-
Rather than having to manually configure each Chromebook, multiple installations using the stored options can be centrally managed in the Google Admin Console. Click Export As File to create a configuration file containing the settings. Before the file is generated, you have the option to allow changes to the Client Name and MAC Address fields on the Options page. By default, the generated file will disable these two settings.
-
Click Generate File. By default, the file will be named Config.json. This file can then be uploaded to the Google Admin Console in order to centrally apply the NetSupport School Student configuration to the required devices.
The current connection status can also be checked at each Student Chromebook by right-clicking on the NetSupport School Student extension icon.
Red indicator = no current connection to the NetSupport Connectivity Server.
Yellow = attempting a connection.
Orange = connected to the NetSupport Connectivity Server.
Green = connected to the NetSupport School Tutor Console.
See also:
