Installing the NetSupport Connectivity Server
The NetSupport Connectivity Server or Name and Connectivity Server/Gateway is designed to broker connections between the NetSupport School Tutor application used by teachers and the NetSupport School Student extension for Google Chrome. It must, therefore, have a static IP address and be accessible at all times by the Tutor application and Student extension across the network.
Starting the installation
The NetSupport School installation will start displaying a Welcome screen.

Click Next.
NetSupport Licence Agreement
The NetSupport Licence Agreement is displayed.
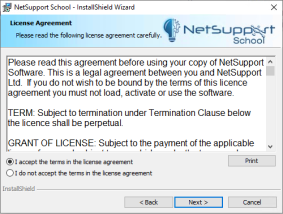
Please read the Licence Agreement carefully and select 'I accept the terms in the Licence Agreement'. Click Next to continue.
If you reject the Licence Agreement ('I do not accept the terms in the Licence Agreement), click Cancel. NetSupport School will not be installed and you will be directed to exit from the install program.
Click Next.
Licence information
Select Register and enter the NetSupport School licence details you have been provided with. If you are evaluating NetSupport School, select 30 day evaluation. Select Non Windows from the drop-down list.
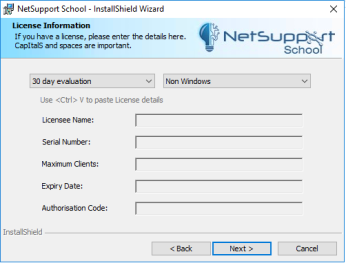
Click Next.
Custom setup
On the Custom Setup dialog, choose the Name and Connectivity Server option.
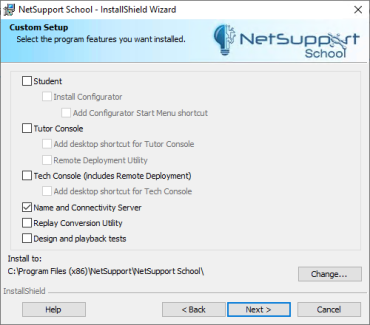
Click Next.
Ready to install the program
To start the installation, click Install. To change any of the previous selections, click Back. To quit the installation, click Cancel.
See also:
NetSupport Connectivity Server Configuration utility
