Centrally configuring and deploying using Cisco Meraki
Step 1 of 2: Adding/deploying the application
-
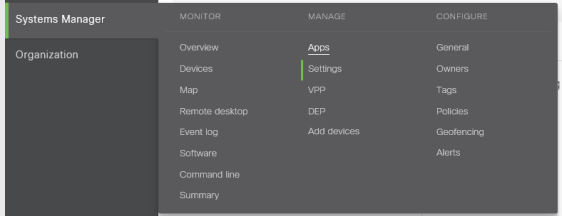
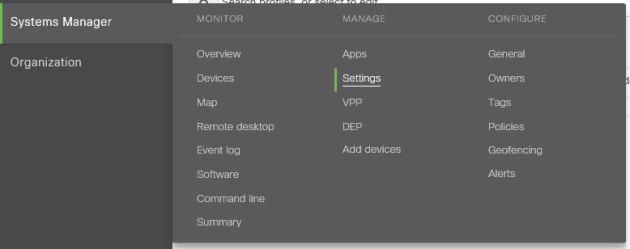
Log into your Meraki interface and choose Systems Manager – Apps.
-
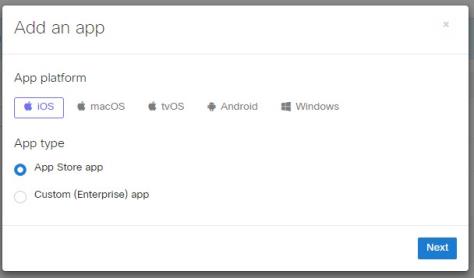
Select Add App. Confirm that the app platform is iOS and the app type is App Store.
-
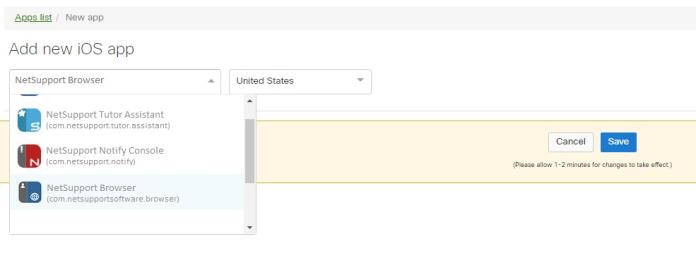
Search for the NetSupport Browser app and select from the list of found NetSupport iOS apps.
-
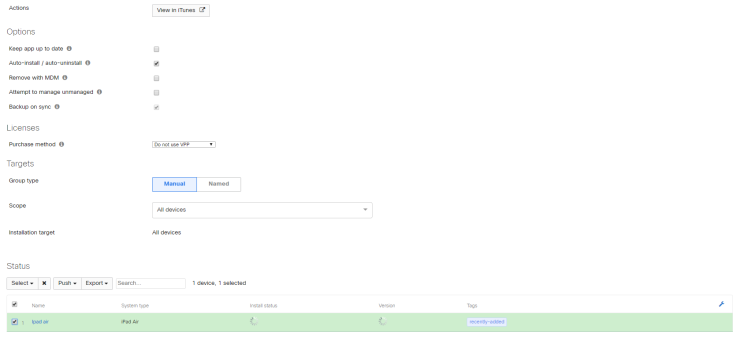
Complete any settings you require and confirm the target devices for the app installation. Click Save when complete.
-
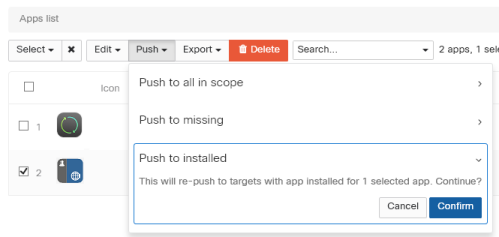
The app will auto install if configured to do so. If at a later date you need to force install the app again, return to the Systems Manager – Apps .
Step 2 of 2: Configuring the application
-
In the Meraki interface, select Systems Manager – Settings.
-
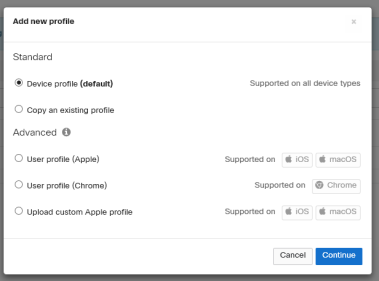
Select Add Profile. Ensure Device Profile (default) is selected and click Continue.
-
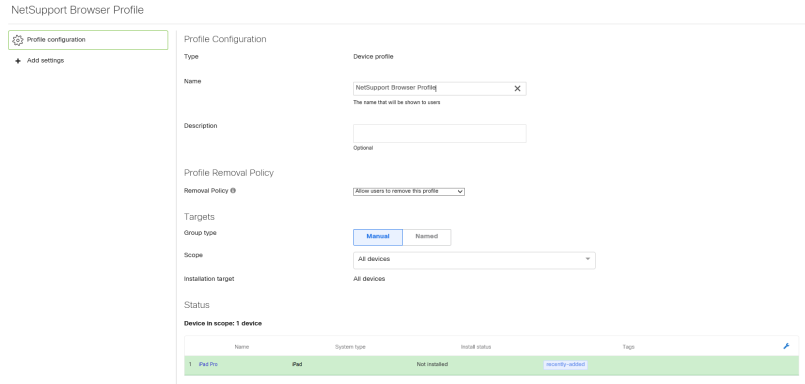
On the Profile Configuration page, assign a suitable name to the new profile and in the Targets section confirm the devices to be included in the scope of the deployment. Click Save when complete.
-
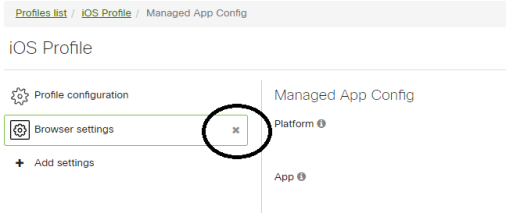
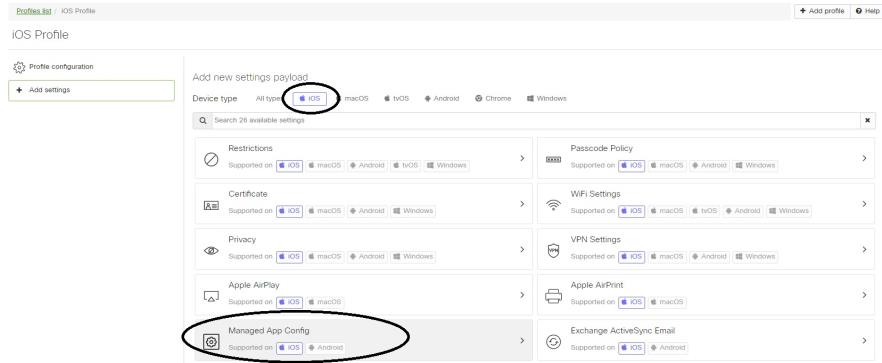
Select the + Add settings option. Confirm that the device type is iOS and in the Managed App Config section, also confirm that the platform is iOS.
-
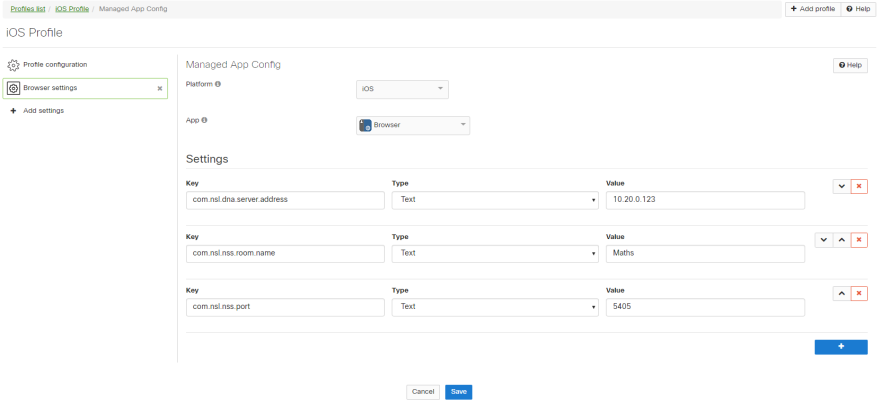
Confirm the profile details by selecting iOS as the platform and NetSupport Browser as the app.
-
You can now configure the required NetSupport parameters to facilitate connections between the iOS devices and, depending on which NetSupport products you have installed, your central NetSupport DNA Server and/ or NetSupport School Tutor. For each parameter, see below for a full list of available commands, enter the Key, Type and Value. Click the Add
 icon to add additional settings. Click Save when complete.
The following settings can be applied to the configure both NetSupport DNA and NetSupport School Student components. As a minimum requirement, you should specify your DNA Server address and port, and if connecting to a NetSupport School Tutor, the required connectivity settings such as the NetSupport Connectivity Server (Gateway) address and key if in use and if using Room mode![]() Allows you to connect to Students in a specified room., the Room Name(s):
Allows you to connect to Students in a specified room., the Room Name(s):
Available NetSupport DNA settings:
| Setting | Key | Value type | Example value | Notes |
| Enable/disable NetSupport DNA | com.nsl.dna.agent.enabled | Boolean | True/False | Enables or disables NetSupport DNA functionality. |
| Server address | com.nsl.dna.server.address | Text | 10.20.0.123 | Sets the NetSupport DNA Server IP address. |
| Server port | com.nsl.dna.server.port | Text | 1743 | Sets the NetSupport DNA port number. |
| Allow roaming user | com.nsl.dna.roaming.user. allowed | Boolean | True/False | Enables or disables login to the app when not connected to the NetSupport DNA Server/off-site. |
| Collect roaming data | com.nsl.dna.roaming.data. collect | Boolean | True/False | The app will continue to collect browser data when not connected to the NetSupport DNA Server/ off-site. |
| Use password authentication | com.nsl.dna.authentication. password | Boolean | True/False | For use in non Active Directory environments where users do not have a username/password login. |
Available NetSupport School settings:
| Setting | Key | Value type | Example value | Notes |
| Enable/disable NetSupport School | com.nsl.nss.student. enabled | Boolean | True/False | Enables or disables NetSupport School functionality. |
| Fixed room name | com.nsl.nss.room. name | Text | Maths | Locks room mode to a fixed room name. |
| List of rooms | com.nsl.nss.room. list | Text | Maths, English, Science | Comma separated room names as a selectable list. |
| Port | com.nsl.nss.port | Text | 5405 | Sets port number for NetSupport School connections. |
| Multicast address | com.nsl.nss. multicast.address | Text | 225.16.8.68 | Sets the multicast address for NetSupport School. |
| Gateway address | com.nsl.nss. gateway.address | Text | 10.20.0.123 | NetSupport Connectivity Server IP address. |
| Gateway port | com.nsl.nss. gateway.port | Text | 443 | NetSupport Connectivity Server port number. |
| Gateway key | com.nsl.nss. gateway.key | Text | Password | Enter the NetSupport Connectivity Server key/ password. |
| Use Gateway | com.nsl.nss. gateway.enabled | Boolean | True/False | Enables or disables the NetSupport Connectivity Server component. |
General settings:
| Setting | Key | Value type | Example value | Notes |
| Default URL | com.nsl.browser. defaulturl | String | Valid URL address | Set the default web page for the browser. |
| Auto sign-out | com.nsl.session. timeout | Number |
0 = Never 2 = 2 minutes 5 = 5 minutes 10 = 10 minutes 15 = 15 minutes 30 = 30 minutes 60 = 60 minutes |
Other number values will be rounded to nearest highest value. |
| Remember login username | com.nsl.login.user. remember | Boolean | True/False | Set the app to remember the login credentials. |
| Use anonymous sign in | com.nsl.login.user. anonymous | Boolean | True/False | Allow users to sign in without domain credentials. |
Conclusion
By following the steps above, the NetSupport Browser app should now be installed on the required iOS devices and configured to connect to your central NetSupport DNA Server and/or NetSupport School Tutor installation.
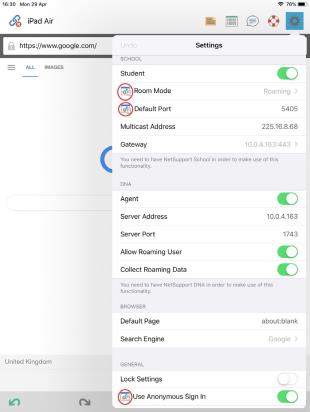
On the iOS devices themselves, the app settings will confirm, where applicable, that the apps configuration has been ‘locked-down’ by a central policy and can’t be edited by users.
If you need to re-deploy the app or a configured profile you can do so by selecting, Systems Manager – Devices. Selecting the device will provide additional configuration options. For example, allowing you to block device users from accessing other applications such as the App Store and preventing them from uninstalling apps.
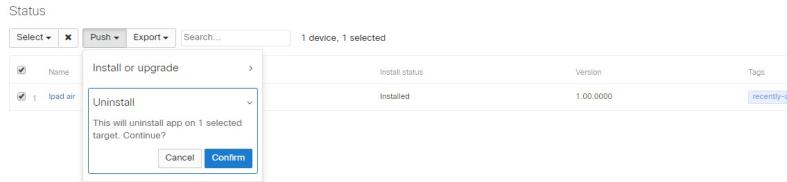
To uninstall the app from devices, select Systems Manager – Apps. Select the app and scroll down to the Status section, use the checkboxes to select which devices you want to apply the command to, then select Push followed by Uninstall.
To remove the configuration profile, select Systems Manager – Settings, select the Profile and click the red cross to delete. Click Save to complete.