NetSupport School Replay File Conversion utility
The Replay File Conversion utility provides more advanced options for converting replay files to video files.
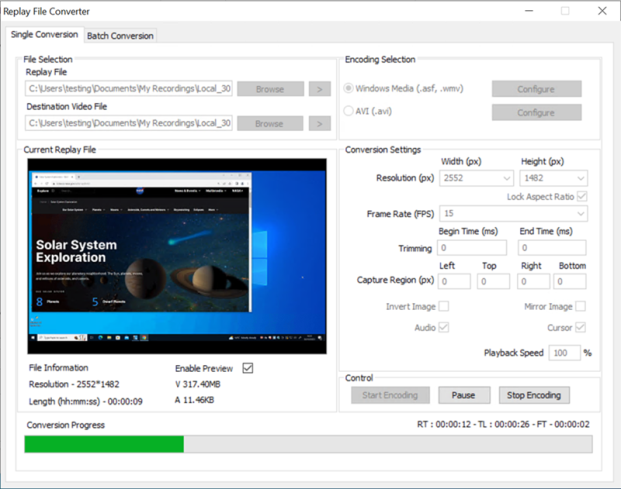
Single Conversion tab
File Selection
Replay File: Click Browse to locate the required replay file. To view the replay file click the View ![]() icon.
icon.
Destination Video File: The location where the converted video files will be stored. Click Browse to change the location.
Current Replay File
Displays information about the replay file selected.
Enable Preview: Enables you to preview the replay file while it's encoding.
Encoding Selection
Windows Media: Converts the replay file to a .wmv file.
Configure: Select which video codec to use and set the required properties. Different profiles can be created and saved from here.
AVI: Converts the replay file to an .avi file.
Configure: Select the video and audio compressor (codec) to use.
Conversion Settings
Resolution: Choose the height and width of the output resolution.
Lock Aspect Ratio: Maintains the proportions of the video when resized.
Frame Rate (FPS): Select the amount of frames per second to use. The higher the rate, the larger the file size, but the better the quality will be.
Trimming: Select whether to trim time at the beginning and/or end of the video file.
Capture Region: Define the pixel area you wish to capture.
Invert Image: Invert the image.
Mirror Image: Mirror the image.
Audio: Include audio in the video file.
Cursor: Include the cursor in the video file.
Playback Speed: Choose the playback speed.
Control
Start Encoding: Starts the conversion process. You can pause or stop the encoding if required.
Batch Conversion tab
You can select multiple replay files to be converted using the same settings.
See also:
Converting replay files to video files
