Student Register dialog
This dialog enables the Tutor to create a customised registration form, which will prompt Students for their details. By selecting a name, the Tutor can also interact with Students using the View and Chat options.
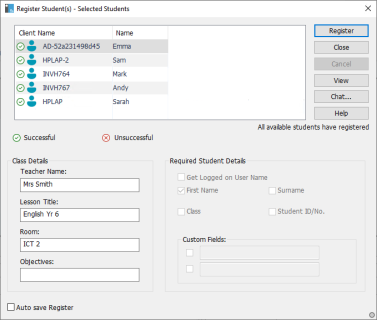
Register Student(s) dialog
Class Details
If required, the teacher name, lesson title, room and lesson objectives can be included on the registration form that is sent to Students. These details will be completed if you have already input them in the Class wizard.
Required Student Details
Decide which details to prompt the Students for. You can also add two custom fields to the form.
Auto Save Register
Student registration details can be viewed in a report, but this will be lost when the Tutor disconnects. If you want to store a copy of the report, check this option. You will be prompted for a file name, location and file format (CSV, HTML or XML).
Click Register to send the form to Student machines. You can monitor progress as the Students respond. Click Close when all Students have signed in, the Student icon in the Tutor Console now displays the registered name.
