Create Class list
This dialog allows you to create and edit a Class list of computers to connect to.
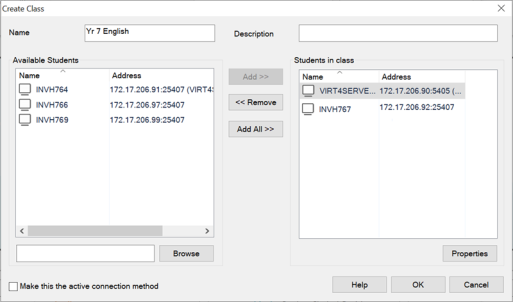
Create Class dialog
Specify a name and description for your class.
Enter a prefix for the computer names of the Student machines you want to connect to in the text box and click Browse. All NetSupport School Students found will appear in the Available Students list.
Add the Students you want in your class by selecting their icon in the Available Students list and clicking Add. If you want to add all the Students found, click Add All. If you want to remove a Student, select their icon in the Students in class list and click Remove.
See also:
Connect to Students using PC mode
