Working with groups
NetSupport School provides you with grouping functions to enable you to manage and organise different groups of Students. You can use the following functions on groups as a whole:
-
Transferring files
-
Message
-
Lock/unlock Students
-
Blank screens
-
Chat
-
Question and Answer teams
To create a group
-
Select the Groups
 icon on the Group bar.
 -
The Group window will appear. Any existing groups will be listed.
-
Select the Create icon on the toolbar. Enter the name for the group and select the members by highlighting the Students to include in the group.
-
Select the Save
 icon.
icon.
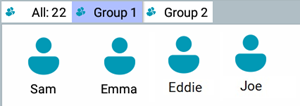
Your newly created group will appear as a tab on the Group bar for quick access.
To change the members of a group
-
Select the Groups
icon on the Group bar. -
Highlight the group you wish to change and select Edit on the toolbar.
-
Select the Save
icon when you are happy with the members of the group.
To delete a group
-
Select the Groups
icon on the Group bar. -
Highlight the group you wish to delete and select Delete on the toolbar.
-
The group will be removed.
