NetSupport School Deploy - Room mode
NetSupport School provides a quick and easy way to assign PCs to a particular room and quickly deploy the Student software to those machines. The Tutor specifies the required room at the start of a lesson and will connect to all computers in that room.
Deploy the Student software to machines in a room
-
From the NetSupport School Startup wizard select Classroom.
-
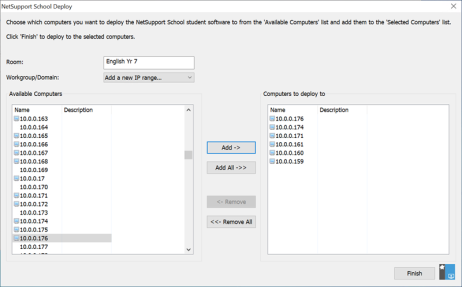
The NetSupport School Deploy dialog appears.
-
Enter the room to assign the computers.
-
The Workgroup/Domain drop-down list displays all the available domains and workgroups, you can also deploy to specific IP ranges by selecting Add a new IP range from the list.
-
The available computers are displayed in the Available Computers list.
-
Select the computer(s) to deploy the Student software to and click Add. The computer(s) will be moved to the 'Computers to deploy to' list.
-
Click Finish to commence the installation. A progress dialog appears, enabling you to monitor the deployment as it installs on each computer.
-
The NetSupport School Student software is deployed to the requested machine and assigned to the room specified.
See also:
Connecting to Student via Room mode
