Monitor mode
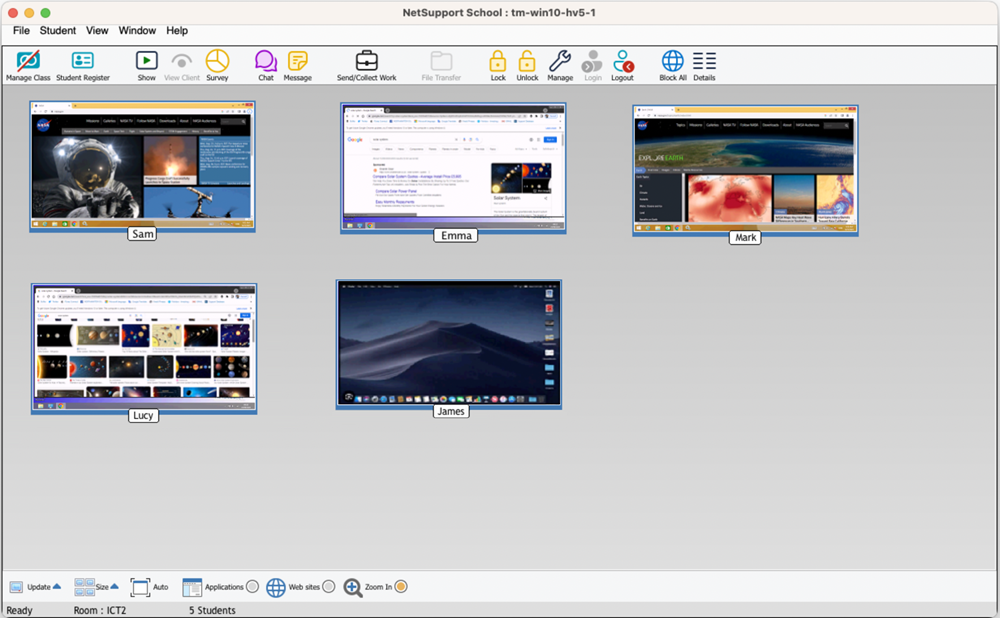
Monitor mode, the default Tutor mode, enables the Tutor to view multiple Student screens simultaneously. A convenient thumbnail view of each connected Student screen is displayed at the Tutor, providing a quick and easy method for monitoring Student activity. While in Monitor mode, the Tutor still has access to the full range of NetSupport School features such as View and Chat.
The List view![]() Displays the currently connected Students or groups. You can switch the display mode between large icons and details view from the View tab in the ribbon. will display each Student thumbnail. By mousing over a thumbnail, you can zoom into that screen. Double-clicking on a thumbnail will open a view session to the selected Student, right-click and you can select from the full range of available Student features. For example, by selecting multiple thumbnails you can invite those Students into a Chat session.
Displays the currently connected Students or groups. You can switch the display mode between large icons and details view from the View tab in the ribbon. will display each Student thumbnail. By mousing over a thumbnail, you can zoom into that screen. Double-clicking on a thumbnail will open a view session to the selected Student, right-click and you can select from the full range of available Student features. For example, by selecting multiple thumbnails you can invite those Students into a Chat session.
In the List view, the Students can be viewed in two different ways, Thumbnail mode or Details mode. Choose {View}{Thumbnail mode/ Details mode} or right-click in the List view and select one of these options to change the layout of the Student icons.
Monitor mode provides a number of additional tools:
Arrange to layout
You can rearrange the Student thumbnails in the List view to reflect the layout of the classroom.
-
Rearrange the Student thumbnails to your preferred layout.
-
The next time you open the Tutor, select {View}{Arrange to layout} from the Tutor Console drop-down menu.
-
The Student thumbnails will revert to the last remembered layout.
Customise thumbnail size
Student thumbnails can be resized to suit personal preferences. This is particularly useful when connected to large numbers of Student machines.
-
Choose {View}{Size} from the Tutor Console drop-down menu.
-
Select the required size from the available options.
Or
-
Click the Size icon at the bottom of the Tutor Console.
-
Select the required size by moving the slider across.
Auto-fit size of Student thumbnail
This option will automatically adjust the size of the displayed thumbnails to fit the window.
-
Choose {View}{Auto fit Students} from the Tutor Console drop-down menu.
Or
Click the Auto icon at the bottom of the Tutor Console.
Changing the thumbnail refresh rate
Depending on how closely you want to monitor Student activity, you can adjust the frequency at which the thumbnails are refreshed.
-
Choose {View}{Update} from the Tutor Console drop-down menu.
Or
Click the Update icon at the bottom of the Tutor Console.
-
Select the required time interval from the available options.
Show active application
When enabled, an icon will appear in the top left of each thumbnail indicating which application is currently active at the Student machine.
-
Choose {View}{Show Active Application} from the Tutor Console drop-down menu.
Or
Click the Applications icon at the bottom of the Tutor Console.
Show active website
Displays an icon in the top right of each thumbnail indicating which site the Student is currently visiting.
-
Choose {View}{Show Active Web Site} from the Tutor Console drop-down menu.
Or
Click the Web Sites icon at the bottom of the Tutor Console.
