Chatting to Students
NetSupport School CCE allows you to chat to any number of connected Students simultaneously via a scrolling text window.
To chat to Students
-
Select the Students you want to chat to in the List view. If you do not select a Student icon, all connected Students will be included.
-
Select the Class tab on the ribbon and click Chat.
Or
Right-click an individual Student and choose Chat.
-
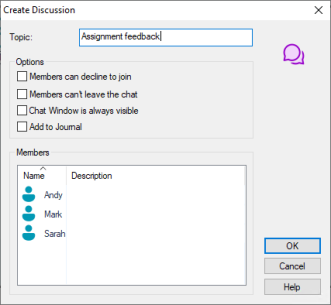
The Create Discussion dialog appears.
-
Enter a topic name for the chat session and select the relevant options.
-
Click OK to start the chat session.
-
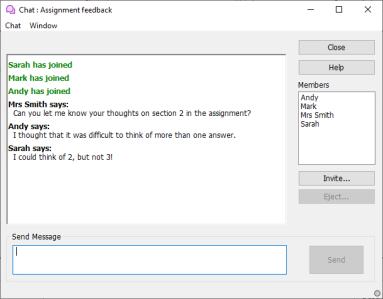
The Chat window appears on the Tutor and Student devices.
-
The members of the chat session are listed. Enter your message and click Send. Your message and any replies appear in the main body of the window.
-
Click Invite to add students to the chat session.
-
Students can also initiate Chat sessions by opening the Student main window (click the Student icon in the system tray) and choosing {Commands}{Chat} or by clicking the Chat
 icon on the Student Toolbar.
-
By default, the Student can only chat to the Tutor. However, you can enable Students to chat with each other by selecting the Student to Student Chat option in the Student User Interface settings.
Chat to a Student whilst viewing
-
Select the Tools tab in the View window ribbon and click Chat.
-
The Chat window opens on the Tutor and Student machine.
To end a chat
-
Click Close in the Chat window.
Or
Select {Chat}{Close} from the Chat window drop-down menu.
See also: