Collect work files
Two methods are available for retrieving completed work files from Student machines:
-
Quick collect: Remembers the last file(s) sent via quick send and provides a quick and easy method for retrieving the work back at the end of a session.
-
Advanced collect: Lets you select the file(s) to retrieve from a list of pre-defined send/collect operations and provides greater flexibility as to which Students the work is collected from.
To collect work using quick collect
-
Select the Work Planner tab on the ribbon and click Collect Work.
-
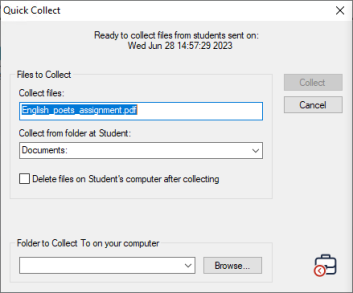
The Quick Collect dialog appears.
-
By default, the file(s) you previously sent are listed. To collect different files, replace the file name.
-
Specify the folder containing the file(s) and whether to remove them from the student machines after they have been collected.
-
Specify where to save the collected files on the Tutor machine.
-
Click Collect.
-
The results are displayed so you can confirm the work was collected successfully.
-
Click OK.
To collect work using advanced collect
-
Select the Work Planner tab in the ribbon and click Send/Collect Work.
-
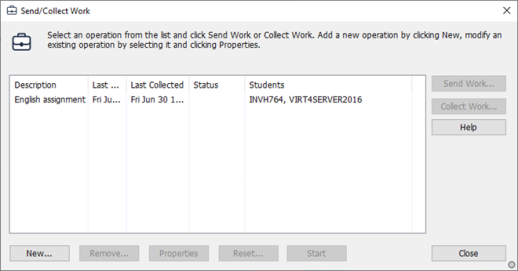
The Send/Collect Work dialog appears.
-
Select the required operation from the list and click Collect Work.
-
The Select Students dialog appears.
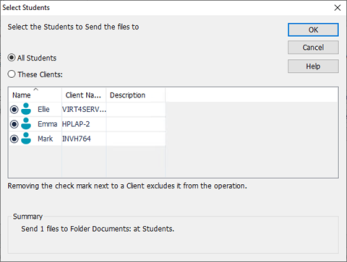
Select the Students you want to retrieve the file(s) from.
-
Click OK.
-
The result of the operation will be displayed for you to check that the work has been collected successfully.
-
Click OK.
See also:
To change the properties of an operation