Define and view Student security settings
The Tech Console![]() A unique console specifically for technicians, providing a single view of all machines across the school. allows you to view the current security status for Students, modify the security settings such as the firewall, Windows updates etc, for Students and configure the settings that determine whether a PC is secure. If a Student meets the conditions that define a secure PC, a green shield is displayed in details view. This will turn red if the Student fails to meet even one of these conditions.
A unique console specifically for technicians, providing a single view of all machines across the school. allows you to view the current security status for Students, modify the security settings such as the firewall, Windows updates etc, for Students and configure the settings that determine whether a PC is secure. If a Student meets the conditions that define a secure PC, a green shield is displayed in details view. This will turn red if the Student fails to meet even one of these conditions.
Define a secure PC
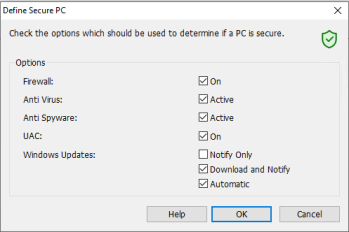
Define what options determine whether a PC is classed as secure.
-
Select the Security tab in the ribbon and click Define.
-
The Define Secure PC dialog appears.
-
Select the required options.
-
Click OK.
View current security settings
In details view, the current security status for Students is displayed in the Security column. Hovering over the shield will display the current status of all items for a Student.
-
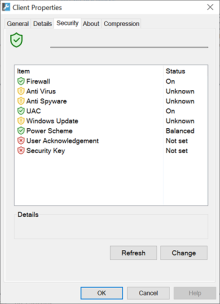
Right-click the Student icon and select Properties
 .
. -
The Client Properties dialog appears.
-
Select the Security tab.
-
The current security status for the Student is displayed.
Change the security settings
-
Select the Student icon.
-
Select the Security tab in the ribbon and click Security Settings.
Or
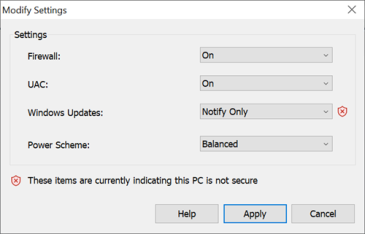
In details view, right-click the shield in the Security column and select Modify Security Settings.
-
The Modify Settings dialog appears.
-
Alter the settings as required.
-
Click Apply.
Or
-
Right-click the Student icon and choose Properties
. -
The Client Properties dialog appears. Select the Security tab.
-
Click Change and alter the settings as required.
