The File Manager window
You can manage files on a Tech Console![]() A unique console specifically for technicians, providing a single view of all machines across the school. machine using the File Manager window. This is similar to the File Transfer window but only displays the contents of the Tech Console machine.
A unique console specifically for technicians, providing a single view of all machines across the school. machine using the File Manager window. This is similar to the File Transfer window but only displays the contents of the Tech Console machine.
-
Select the Tools tab in the Tech Console ribbon and click File Manager.
-
The File Manager window appears.
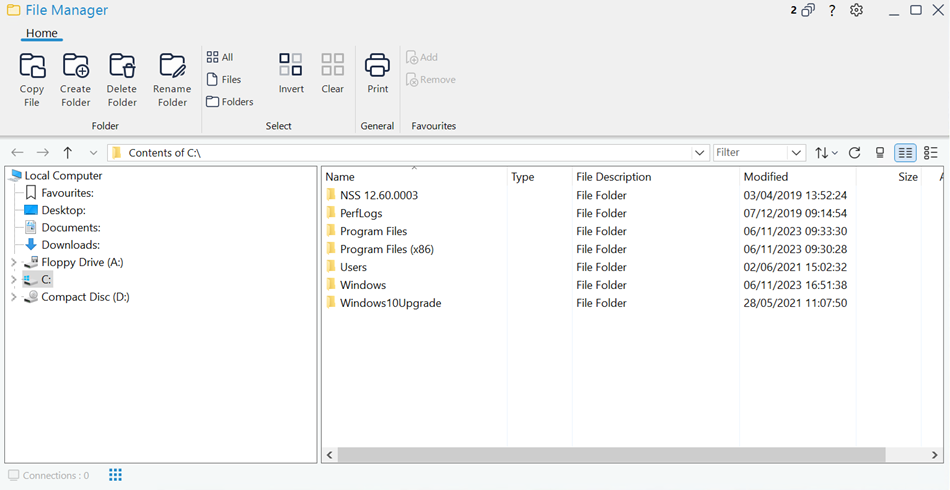
The window is divided into the following sections:
The caption bar
The caption bar shows that you are in the File Manager window. The following options are available on the right-hand side:

[Multiple windows icon]
Shows how many windows are open. From here, you can access the Window menu.

[Settings icon]
Access the File Transfer settings for the current configuration.

[Online help icon - question mark]
Access the online help and version number, licensee, Technical Support and compression information.

[Minimise window icon]
Minimise the window.

[Maximise window icon]
Maximise the window.

[Close window icon]
Close the window.
The ribbon
The ribbon provides access to all the tasks and tools when working with a selected file or folder. Positioning the cursor over an icon will display a brief description of its function.
The following sections are available in the Home tab of the ribbon:
Folder: Provides access to the options for working with folders, such as copy, delete and rename. You must select a folder to work with before the options become available.
File: Provides access to the options for working with individual files, such as copy, delete and rename. This section will only appear when you have selected a file to work with.
Select: Allows you to select the files and folders in the List view
 Displays the currently connected Students or groups. You can switch the display mode between large icons and details view from the View tab in the ribbon. that are to be transferred.
General: Enables you to print the content of a selected folder or file list and access a list of recent files to send to the Student.
Favourites: Add or remove the currently selected folder to the Favourites folder in the Tree view.
When a file or folder is selected, a new tab displaying its properties will appear. The following sections are available:
Attributes: View and set the attributes for the selected file or folder.
Information: Provides a summary of the selected file or folder.
Actions: From here, you can perform actions such as open, copy, delete or rename.
The local pane
The local pane displays a Tree view of the folders of the Tech Console on the left-hand side and a List view of the contents of those folders on the right-hand side.
File information area
The file information area is displayed at the top of the local pane. Use the arrows to go to the previous, next or parent folder in the Tree view. Click
 to select from a list of previously selected folders. The current folder path will be displayed and you can enter a pathname here to go directly to a folder. You can filter, sort and choose how to view the contents of the List view.
The status bar
The status bar shows the number of connected Students. You can see a list of all connected Students by clicking Connections (clicking a Student name opens a File Transfer window for them).
