Tutor profiles
NetSupport School allows you to set up multiple Tutor profiles for different Tutor users, each with a pre-defined set of options. On starting the Tutor Console, if multiple profiles have been created, a dialog is displayed that allows the user to select which profile to use.
The main benefit of creating a profile is to be able to store ready-made lists of approved/restricted applications, websites and keywords rather than have the user create these at the start of each lesson.
Having created your Application, Website or Word lists, as detailed in the Web Control, Application Control and Keyboard monitoring sections, the files can then be added to a Tutor Profile.
To create a Tutor profile
-
Create the files containing details of approved/restricted websites, applications etc that are to be included in the profile.
-
Click Options in the Tutor Console, select Network Settings from the drop-down menu and choose Administration - Profile.
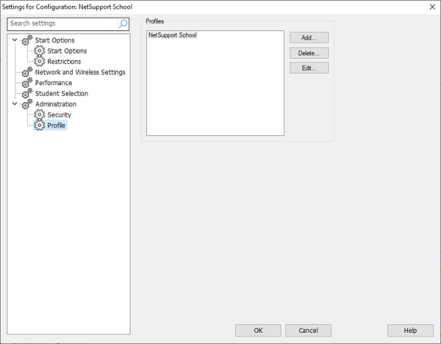
A list of existing Tutor Profiles will appear, NetSupport School is the default.
-
To create a new profile, select Add. The Create New Configuration dialog appears.
-
Enter a name for the profile. Functionality for the profile can be 'copied from' an existing Tutor configuration, the default NetSupport School or a user defined profile. Click OK. The name will be added to the profile list.
-
To change the content of the profile, click Edit. The File Locations dialog appears.
-
In each category, select the file to be used in the profile. The Folder Locations dialog allows you to change where items are located.
-
Click OK.
Each time the Tutor Console is started, the user will be presented with a list of locally stored profiles to choose from. Should you wish to share profiles across a network, the /R command line instruction can be used to launch the Tutor program with a centrally available profile.
For example, from the NetSupport School program folder run the command; pcinssui /rN:\SampleProfile.cfg. If the profile, in this example SampleProfile.cfg, does not currently exist a default will be loaded, enabling you to add your own values. Once you exit the Tutor Console, the profile will be stored in the specified location.
See also:
Create list of approved/restricted websites
Create list of approved/restricted applications
Tutor Administration - Profiles
