Create an exam
Having created a suitable mix of questions, adding those questions to an exam is a quick and easy process.
The Exam wizard guides you through the process of selecting the required questions, setting a time limit for the exam, using your own grading system and including supporting information. New questions can also be created during this process.
To create an exam
-
Select the Home tab and click Create in the Exams section of the ribbon.
-
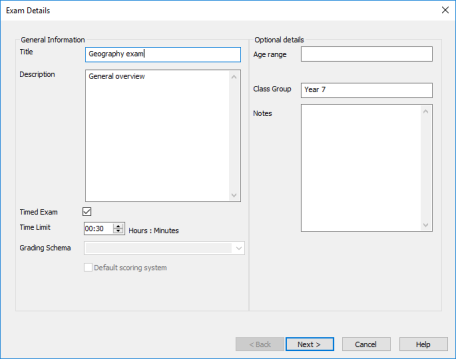
Enter the exam details and choose whether the exam is timed. You can use your own grading system by selecting from the Grading Schema drop-down
-
Click Next.
-
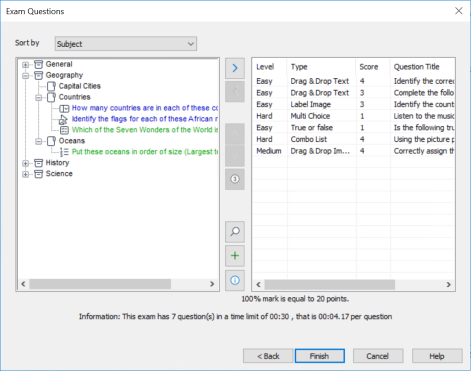
Select the questions to include in the exam. Expand the tree view in the left-hand pane, select the required question and click the Add
 icon.
icon. -
The selected questions appear in the right-hand pane. From here, you can use the icons to remove a question from the exam, change the order of the questions, preview a question, assign a different score to a question or create a new question.
-
Click Finish to save the exam in the Exams pane tree view.
Once created, you can use the ribbon to edit or delete exams, preview exams and publish the exam.
See also:
Testing Console - run exam at Student machines