Tutor View settings
This option provides configuration options for the viewing of Student machines.
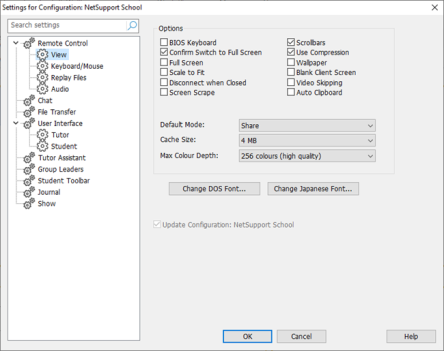
Settings for Configuration: NetSupport School dialog
The View settings can be configured in two ways:
-
To apply the settings for all Student View sessions, click Options in the Tutor Console, select Settings from the drop-down menu and choose View.
-
To apply the settings for an individual Student View session, click the Settings
 icon on the View window caption bar and select View.
A brief description of the available options follows:
Options
BIOS Keyboard: Checking this option causes the Tutor to emulate keystrokes on the Student, at the BIOS level rather than the hardware level. Use this if an application at the Student does not appear to be correctly accepting keystrokes from the Tutor. Only use this option if you are experiencing problems with the default low-level keyboard option.
Confirm Switch to Full Screen: When this box is checked, you will be prompted to confirm switching to full screen mode.
Full Screen: Checking this option will force the Tutor to view a Student in full screen mode rather than in a windowed mode.
Scale to Fit: Check this option if you want the contents of the View window to be automatically shrunk to fit the sizeable frame.
Disconnect when closed: Check this option to disconnect from a Student when a View window is closed.
Screen Scrape: NetSupport School's favoured, and the most efficient, method for capturing screen data is to hook into the Video Driver of the machine being viewed. However, there may be occasions when this method will not work because certain applications bypass the driver. In these circumstances, you can enable 'screen scrape' mode in order to take a snapshot of the screen. Although this will have a greater impact on the network, it will at least provide an accurate representation of the Student's screen.
Scrollbars: You can turn off scrollbars on the View window by checking this option. This is useful when using auto-scroll, as you gain a little extra workspace.
Use Compression: Select this option to enable compression when viewing a Student's screen. The state of this checkbox is also reflected in the Client Properties.
Wallpaper: Select this option if you want the Student's wallpaper to be visible when viewing. Normally this is turned off to improve performance, so expect the screen update speed to be impacted by selecting this option.
Blank Client screen: This enables the Tutor to blank the Student screen in any of the View modes.
Video Skipping: A Tutor's viewing performance can be configured using video skipping. The Tutor program will not display Student screen updates if a subsequent update to the area of the screen is made. Unticking the box will result in all Student screen updates being displayed at the Tutor.
Auto Clipboard: When enabled, provides the quickest method for copying data. Use the short cut keys (Ctrl+C and Ctrl+V) to automatically copy to and from the clipboard at both the Tutor and Student machines.
Default Mode: When you view a Student, by default, you start viewing in Share mode. If you prefer to start viewing in a different way, change the style from the list provided.
Cache Size: The NetSupport School Tutor contains a cache to help improve overall performance. The cache sizes range from 256KB to 16Mb and a separate cache is allocated to each Student connection. If you are running applications on the Student that use lots of or large bitmaps, increase the cache size to improve the performance.
Max Colour Depth: When you connect to a Student, you can restrict the colour depth that is sent. This is done to reduce the amount of traffic between the Student and Tutor.
Change DOS Font
Use this dialog to select the font to use when displaying DOS screens. This will be from Windows Students running full screen DOS boxes. Windows uses a graphic character set for displaying DOS screens. The higher the resolution that you are running Windows in the larger the font size you will need to set to get an accurate representation of a DOS screen.
Change Japanese Font
Use this dialog to select the font to use when displaying Japanese DOS screens.
