To launch an application on a group of Students
Launching applications on a group of Students
-
Click the drop-down icon on the required group tab (mouse over the right-hand side of the group tab to display this) and click Quick Launch.
-
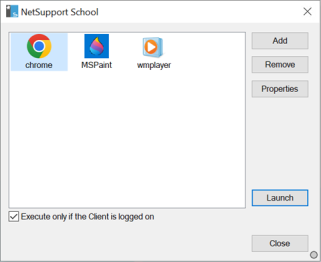
The Launch Application dialog appears.
-
Click Add.
-
Enter the name and path of the application to launch at the Students.
Or
Click Browse and select an executable application on the Tutor machine.
Notes:
-
When adding applications on Windows machines that have the Microsoft Store, two tabs will be displayed in the Application Properties dialog. The Desktop Application tab allows you to add standard Windows applications as detailed above. The Windows Store Application tab lists Windows Store applications.
-
Check that Student applications are stored in the same location as the Tutor to ensure successful execution.
-
-
Click OK.
-
The application icon will be displayed in the Launch Application dialog and saved for future use.
Note: If you only want to execute applications to Students that are logged on select the option Execute only if the Client is logged on. -
Select the required application and click Launch.
See also:
Remotely launching applications and websites at Students
Remove a saved application or website
Edit a saved application or website
