Student Register
By default, NetSupport School displays the machine name of the Student machine in the Tutor Console. However, there may be times when you want the Tutor to display the actual name of the student and request additional information.
The Student Register option enables the Tutor to prompt the Students for their details.
To prompt Students to log in
-
If specific Student details are required, select the relevant Student icons in the Tutor Console. Alternatively, to prompt all connected Students, leave the icons unselected.
-
Select the Class tab in the ribbon and click Student Register.
-
The Register Student(s) dialog appears.

-
You can then select the information that the Student will be required to complete.
-
Click Register to send the form to Student machines. You can monitor progress as the Students respond.
-
Click Close when all Students have signed in.
-
If you enabled the Auto Save Register option, you are prompted for a file name, extension type and location for the registration report. Click Save.
-
The Student icons in the Tutor Console now display the registered name.
Sign out
At the end of a lesson, you can reset the Student names using the sign out option.
-
Select the Class tab in the ribbon, click the Student Register icon and choose Sign Out.
-
Confirm that you want to unregister the Students.
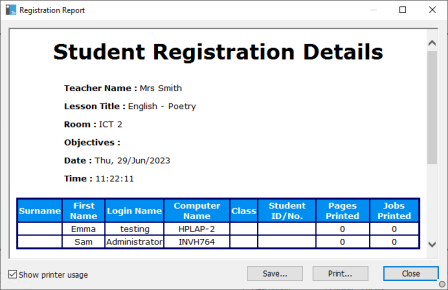
Registration report
Student registration and printer usage details can be viewed in a report, but this will be lost when the Tutor disconnects.
-
Select the Class tab in the ribbon, click the Student Register icon and choose Registration Report.
-
To print a copy of the report, select the Class tab in the ribbon, click the Student Register icon and choose Quick Print.
-
The student register can be added to the Tutor Journal. Select the Class tab in the ribbon, click the Student Register icon and choose Student Register.
