Finding and connecting to Students
The Class wizard enables the Tutor to select the connection mode that best suits their requirements. The Class wizard is displayed when the Tutor program is initially started and when a class is restarted. You can also specify how Students are connected to and configure these settings in the Tutor Configuration. Click Options in the Tutor Console, select Network Settings from the drop-down menu and choose Student Selection.
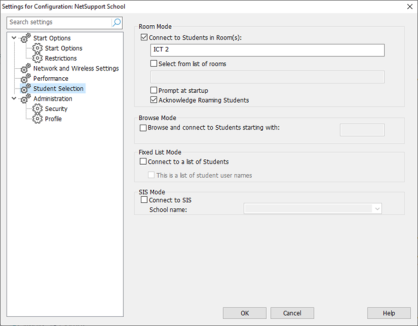
Settings for Configuration: NetSupport School dialog
The connection methods available are:
Room mode: Connect to Student computers by room(s).
PC mode: Connect to a fixed list of Student computers by machine name.
User mode: Connect to a fixed list of Students (by logged on user name).
Browse mode: Browse the network and connect to Student computers with a specific machine name.
SIS mode: Connect to your SIS environment using OneRoster or Google Classroom.
The default method is 'Room mode'.
-
If the expected Students are not found, it may be because NetSupport School has not been configured to browse the required networks. See Configuring NetSupport School for subnet browsing for more information.
-
If a 'NetSupport Connectivity Server/Gateway' has been configured, the Tutor Console will use the details registered here rather than perform a browse across the network.
-
A warning icon will highlight machines you have been unable to connect to. Mouse over the icon to display the reason why the connection failed.
-
If required, a message can be displayed at the Student machine when a connection is made.
See also:
Connect to Students via Room mode
Connect to Students using PC mode
Connect to Students using User mode
