Preset messages
You can store up to five commonly used text messages that can be quickly broadcast to Students using the Message feature.
Creating preset messages
-
Select the Class tab in the ribbon, click the Message icon drop-down arrow and select Preset Messages.
Or
Right-click on a Student icon, click the Message drop-down arrow and select Preset Messages.
-
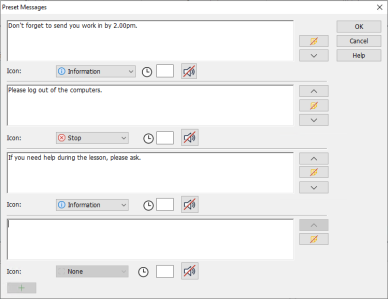
Enter the required text message.
-
Set any additional properties for the message:
-
Choose an icon to be displayed alongside the message. This can be used to quickly identify the type of message, information, question, warning or stop.
-
Indicate how long the message should remain on the Student's screen.
-
You can further highlight the message by playing a sound at the Student's machine. Click the Play a sound
 icon.
icon.
-
-
To add a new message, click the Add a new message
 icon. Use the arrows to arrange the order of messages in the list. Click the Remove this message
  icon to delete a message.
 -
Click OK.
-
The message will show in the Message icon drop-down list in the ribbon, allowing you to quickly send this to Students.
See also:
