Customising the view modes
To enable you to tailor NetSupport School to your exact requirements, a variety of user interface customisation features are available. One of these is the ability to set which view modes you want to display on the left-hand side of the Tutor Console.
To customise the view mode icons
-
Select the View tab in the ribbon, click the icon in the Mode section (this defaults to Home View but may be different if you have switched the view mode) and select Customize.
-
The Customize View Modes dialog appears.
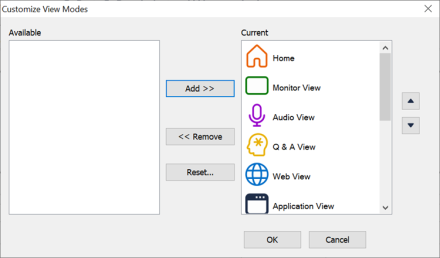
The two lists contain the view modes that can be added and those already in use.
Available: Displays a list of all the view modes that can be added.
Current: Displays the current view modes that are being used.
Add: Choose an item from the Available list and select the position for this item in the Current list. The item is inserted after the selected item when you press this button.
Remove: Choose an item from the Current list to remove and then press this button. The item will be added to your Available list.
Reset: Clicking this restores the Current list to the defaults provided by the user interface.
 Up icon: Click to move the selected view mode icon up one position in the Current list.
 Down icon: Click to move the selected view mode down one position in the Current list.
