Record replay files for all Students
Replay files can be created at any Student machine that the Tutor views.
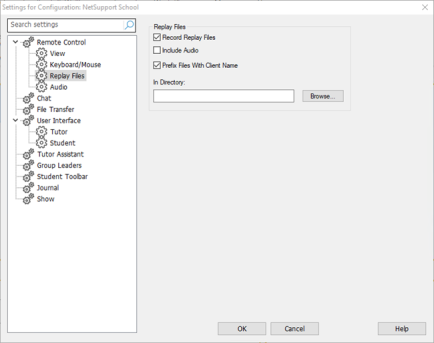
Record replay files
-
Click Options in the Tutor Console, select Settings from the drop-down menu and choose Replay Files.
-
Enable the Record Replay Files checkbox. A replay file will be created each time the Tutor opens a view session at any Student machine.
-
Include Audio
In addition to the screen, mouse and keyboard activity, if the machine is configured for audio, you can record any microphone narration from the Tutor. Check this option to enable.
Note: Desktop sounds, music, etc, are unable to be recorded. -
Prefix Files With Client Name
In order to identify each replay file, file names are prefixed with the Student name and the date/time of the recording. Alternatively, by unchecking this box, the files will be named sequentially in the format 00000001.rpf etc.
-
In Directory
Specify where the replay files are to be stored.
-
Click OK.
See also:
Record replay files for individual Students
Showing replay files to Students
Record replay files at the Tutor machine
