Show leader
While the Tutor screen is being shown to the class, it may be appropriate for a Student to take over the demonstration. For this purpose, the Tutor can assign Show leader![]() Allow a Student to take over and lead a Show session. status to a selected Student. The mouse and keyboard of the Show leader's machine are unlocked and they can continue the presentation on the Tutor's behalf.
Allow a Student to take over and lead a Show session. status to a selected Student. The mouse and keyboard of the Show leader's machine are unlocked and they can continue the presentation on the Tutor's behalf.
The Tutor can still interact simultaneously with the Show leader and can suspend or end the session as required.
To create a Show leader
-
Start showing to Students as normal.
-
When you are ready to create a Show leader, double- click on the Showing
 icon on the taskbar.
 -
This will display the Show Suspended dialog and the Show will be suspended. Student screens will still display the Tutor screen.
-
Click Show Leader.
-
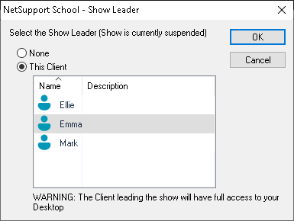
The Show Leader dialog is displayed.
 Note: If the Show icon on taskbar option has previously been selected, you can create a Show leader by right-clicking on the icon and choosing Show Leader.
 -
Click This Client and select the Student to make Show leader.
Note: The Show leader will have full access to your desktop. -
Click OK.
-
The message 'You are leading the Show' appears at the selected Student's machine.
-
Click Resume to restart the Show.
-
The Show leader and Tutor can now interact together in leading the Show.
See also:
